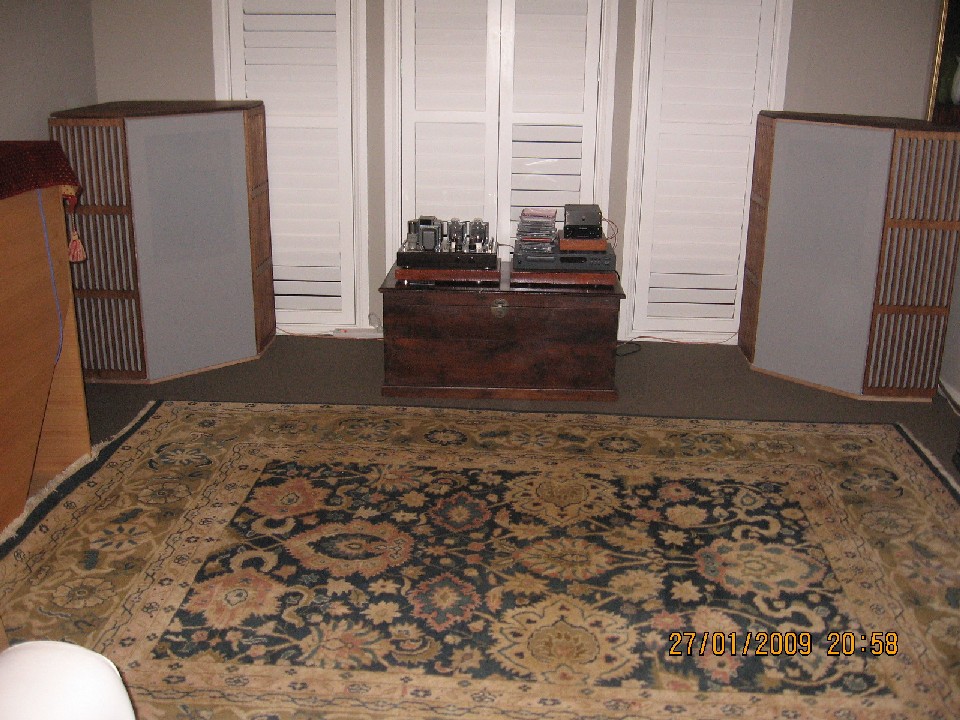
Tannoy GRF Corner Horn (GRF-CH)
This is the first GRF I have built…since this build, I have completed the smaller GRF Rectangular horn in August 2009.
The approach I use is consistent with all my speakers – and relies on CNC’ing a series of identical ‘slices’ to form the complete horn block.
In some models, built-in braces are included in the slices. For the GRF-CH, I added braces after the horn slices were glued.
For subsequent kits/builds, 4 slices will have 8 separate braces in place (32 in total)…so there is no more need for manual work in this regard.Each slice also has computer-cut dowel holes to ensure 100% alignment of slices. 10mm Oak dowels are used, along with standard PVA glue.
This sort of build is a great DIY’ers project.For this project, I used the various drawings from the net of the GRF-CH. I am particularly indebted to Alain Kobsch’s drawing…
as this gave me the insight to produce the 2-dimensional slices as per Alain’s drawing. (Naturally, I had to add the pieces to
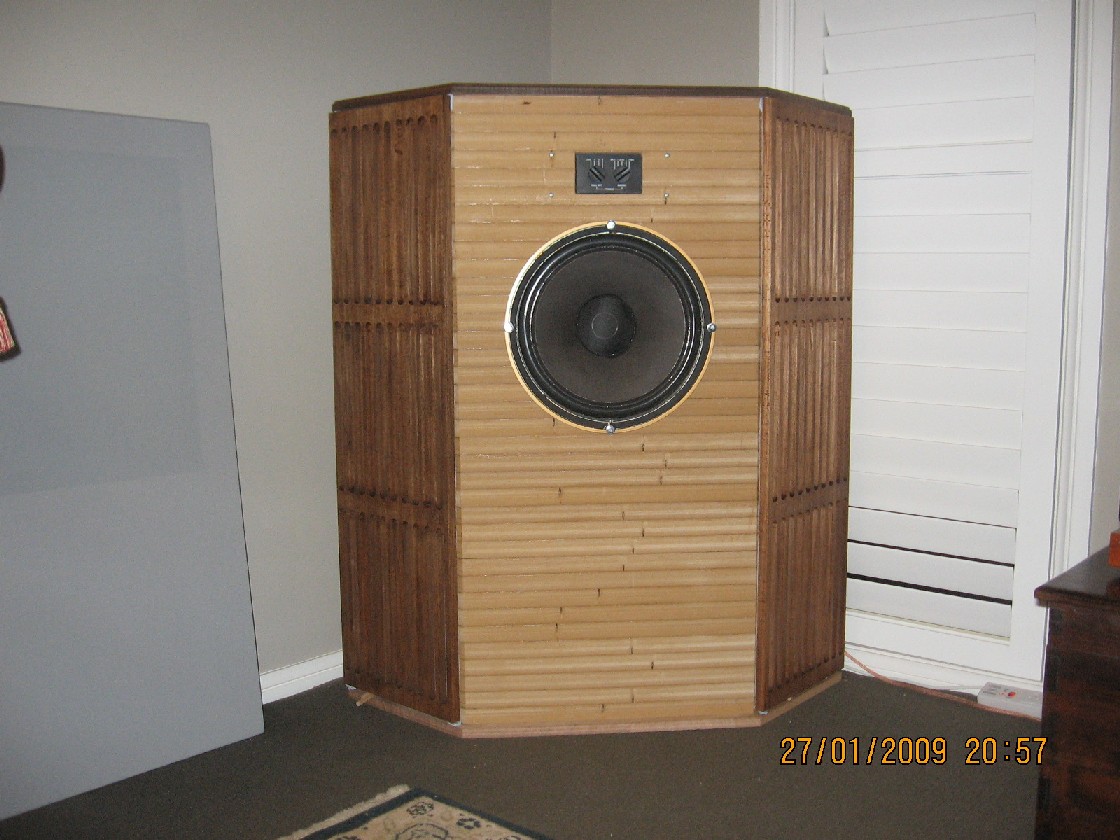
make the horn compounding….)The final measurements were 1190mm tall x 1043mm wide at the widest point and 569mm wide at the front x 701mm deep.
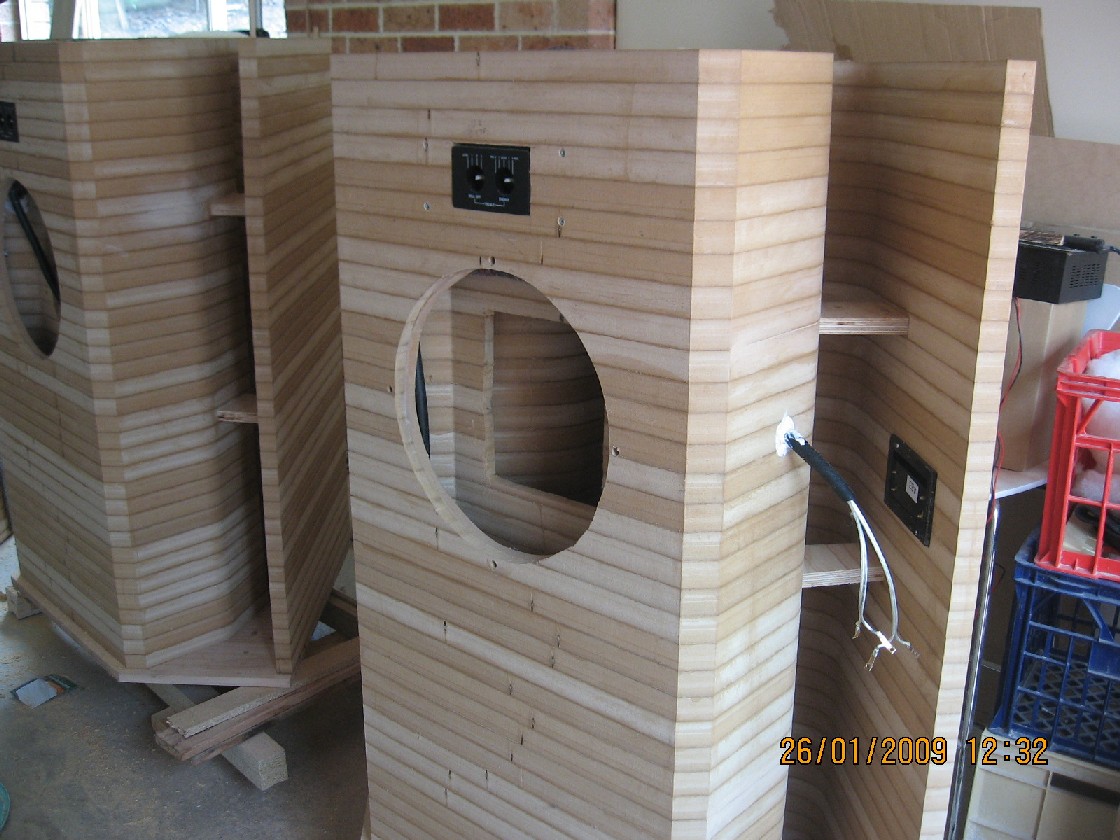
Each cabinet weighs close to 120Kgs, making for a very heavy unit to manoeuvre. (Trolley wheels are recommended!)36 individual layers of 32mm MDF slices make up the internal horn structure (each with 2 pieces per layer…giving 72 separate pieces).
For the first build, I carefully added the angled pieces that extend from behind the compression chamber. This was a tricky job,
as the wood pieces expand on a very unusual angle.For subsequent builds, I have incorporated into the CAD plans a series
of ‘steps’. This means the individual slices are positioned in a special order….giving the same compound expansion as per
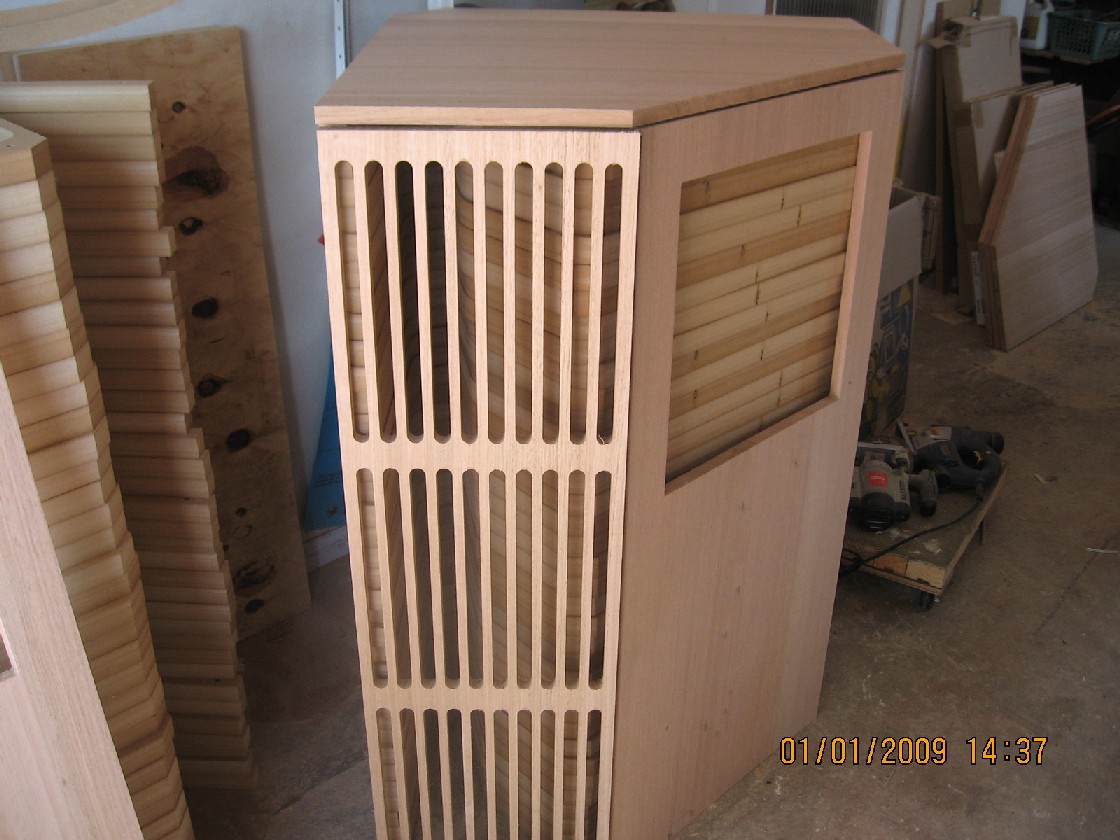
the original Tannoy plan. Easy!The outer panels were 19mm Tasmanian Oak…which were also CNC’d to create the intricate side fluting.
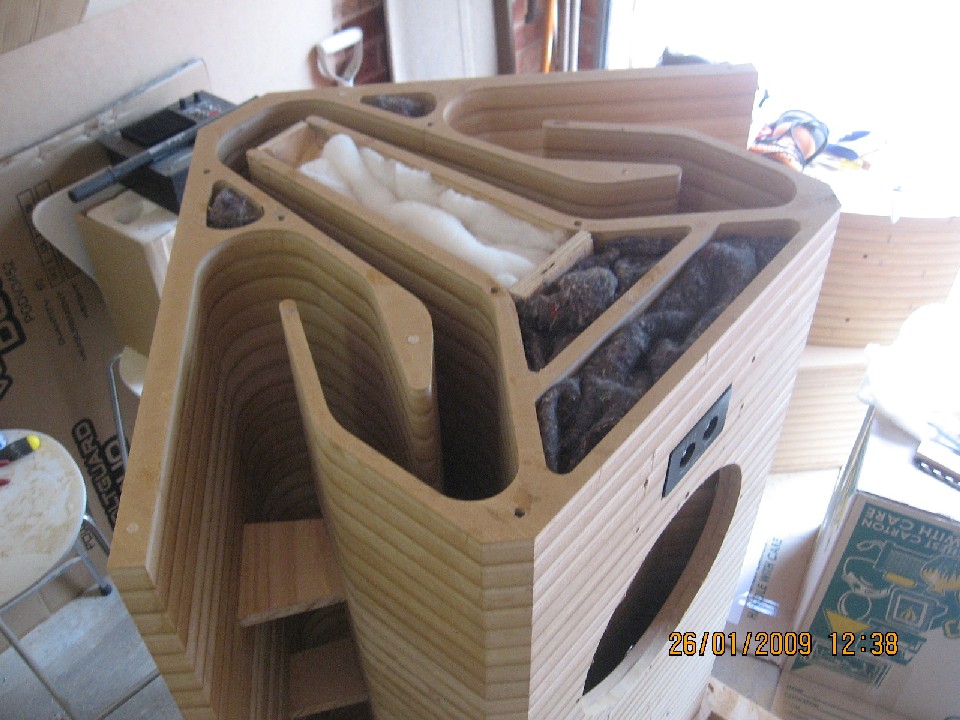
Wool sound deadening material is used in all the cavities.
The front speaker cover panel was 19mm MDF, with computer-cut square shape. I used a lovely silver/grey vintage audio cloth to
cover the entire panel. The panel was then simply Velcro’d (“Hook ‘n Loop”) in place, top and bottom.The outer Tasmanian Oak panels were finished in a dark Walnut stain, and then a bees wax applied….giving a nice aged look.
I use standard bolts and T-nuts to house the driver securely. Internal cabling was sealed in place using a soft corking agent,
should the cables need to be removed later. The crossover unit was secured inside one of the horn mouths, and the dial switches
were routered into the front baffle, just above the driver.
There was a small amount of wool sound deadening used in the compression chamber…just above and below the driver.
The only drivers I heard in these cabinets were HPD’s. The sound was warm, revealing and very ‘real.’ The system was
capable of huge volumes…even with a small SET 300B amp. Original Tannoy cross-overs were used.
The cabinets were built for a friend, and then sold immediately. He was happy, to say the least!
Andrew Tilsley.